
Image: Copyright © Pamela Ann Bevelhymer http://imagesbypamela.blogspot.com/2010/04/blog-post.html

By Susan
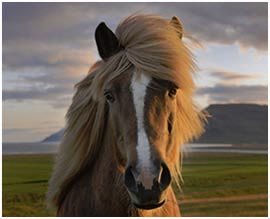
When I first started playing virtual horse games I had no idea how to groom a horse. I did not know the names of the tools used to groom a horse, and I had no idea that grooming took such a long time or had to be done in a particular order. Not every horse likes to stand still to be groomed, especially young horses. It takes a lot of patience to groom an anxious horse. Grooming is important not just for horses looks but also for its health. Grooming removes dirt that gets ground into the coat and improves your horse’s circulatory system.
Grooming Kit
There are many supplies that need to be included in a grooming kit. It is important that all of the grooming supplies be in great working order and are kept clean and dry. Here is a list of the most important tools to have in a grooming kit.
- Rubber curry comb
- Stiff body brush
- Plastic mane and tail comb Soft bristled finishing brush Hoof pick
- Face brush
- Sponges
- Grooming spray
- Bot knife
- Detangler
- Mane tamer
- Sunscreen
- Fly spray
- Shine spray
- Hoof ointment
- Clippers or scissors
- Wound ointment
Steps to Daily Grooming To keep your horse looking and feeling its best, follow these simple grooming steps. Don’t forget to reward a horse who does a good job during a grooming session.
Step One: Currying
Currying brings all of the dirt and dust in a horse’s coat to the surface so that you can brush it away. It is important to use circular motions when currying a horse and work from the head to the back end. Be very careful not to bus too hard on body areas or around the shoulder or hip. Some horses really like the curry brush while others think it is uncomfortable. Any good rubber curry comb will work. Never use a metal curry comb
Step Two: Dandy Brushing
A dandy brush is any medium- stiff brush that is used to get up addition brush from the skin and flick it off of the horse. Use flicking motions with a dandy brush working in short strokes from the head to the back. Be sure to include the upper part of the legs. Once you think you have gotten all the dirt off, use long strokes to finish the job.
Step Three: Finishing and Face Brush
The finishing brush helps to give the horse’s coat a shine and will distribute natural skin oils all over the coat. Carefully brush dried mud and dirt from the face with a face brush. Use a clean sponge and some water to wipe out the nostrils and eyes. Brush ears with a soft face brush. Put a cotton ball inside of the ear before brushing to keep the dirt from going inside of the ear. Be sure to reward your horse with a treat if he lets you do this as it may be uncomfortable. If you see mites in the ear you can apply a small amount of M-T-G, a grooming product found in equine supply stores.
Step Four: Mane and Tail
Spray a little bit of detangler on the horse’s tail and mane. Carefully brush the mane from the tips of the hair to the roots. Always hold the hair in your hand so that you do not pull any out. Groom the tail by hand first before using a mane and tail brush. Use a soft and clean sponge to wipe under the tail.
Step Five: Lower Legs and Feet
Remove the dirt from the lower legs with a stiff bristle brush. Check for lumps or swelling while you brush. Use a sponge to clean the outside of the hoof. Remove caked on mud with a stiff brush. Pick the feet from the frog to the front and brush off dirt with a stiff hoof brush. Apply some natural hoof conditioner to the outside of the hoof.